Christoph and his son Fionn wanted a deep even black on an open-grained mahogany body with the figure still showing through, and the pores kept drying lighter than the surface. Follow the build from the bare kit to the finished bass, and see how they diagnosed it and what you can copy from their approach.
Christoph and his son Fionn set out to do one of the harder things in guitar finishing, and they pulled it off: a deep, even black on an open-grained body, with the figure in the wood still visible underneath. They did it together, in a home workshop in Germany, on their first go.
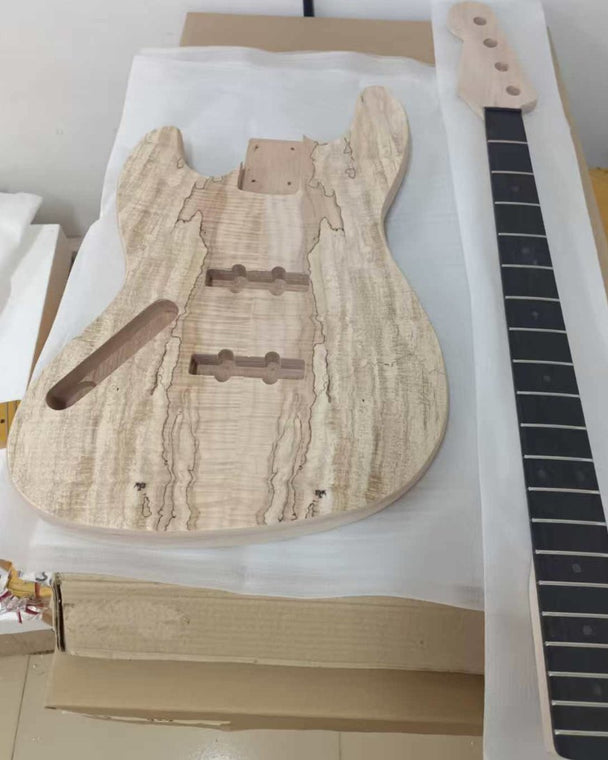
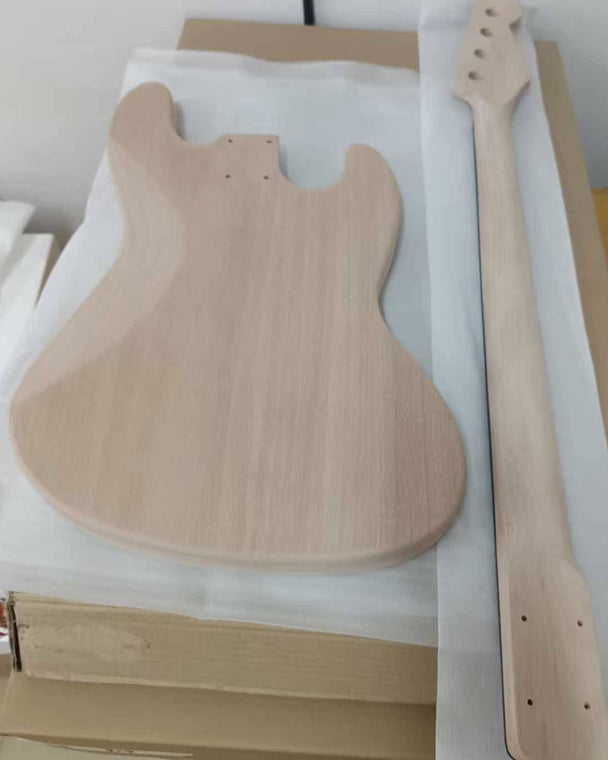
They built the JM Bass Guitar Kit in a left-handed configuration, mahogany body and mahogany neck, with a spalted maple veneer top. This is how it looked before they touched it.
The kit as it arrived: body routed and shaped, spalted maple veneer already laid on the top, neck with the fretboard fitted. Courtesy of Christoph and Fionn Niebel.The back, bare. Mahogany body, mahogany neck, nothing on either of them yet. Courtesy of Christoph and Fionn Niebel.
That choice of wood matters more than it looks. Mahogany is an open-grained timber, which is exactly why it can carry a black finish that still shows movement in the grain. A closed-grain body would give you a flat black and nothing else. The trade is that open grain asks for one extra step, and that step is where this build got interesting.
Coat after coat, and the pores stayed light
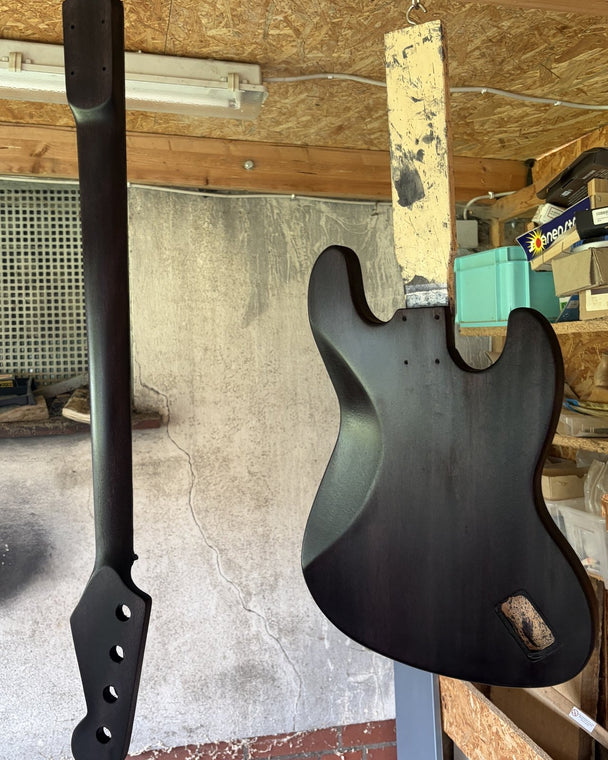
They brushed on a water-thinned charcoal black stain, neck and body together, and kept going. The surface darkened the way it should.
Neck and body hanging together after staining. Even at this stage the figure is still reading through the black. Courtesy of Christoph and Fionn Niebel.
The pores did not.
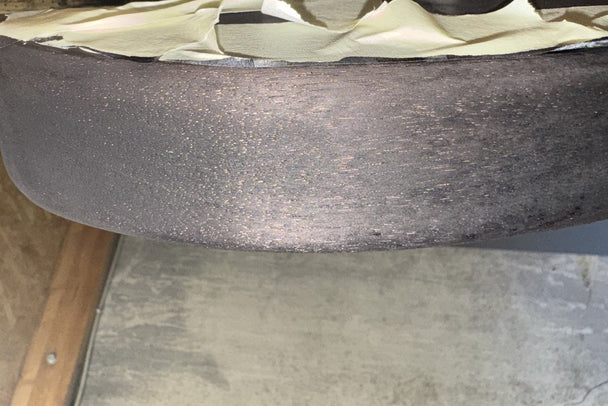
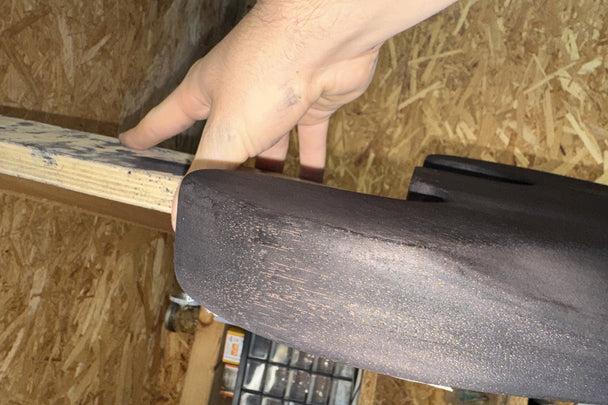
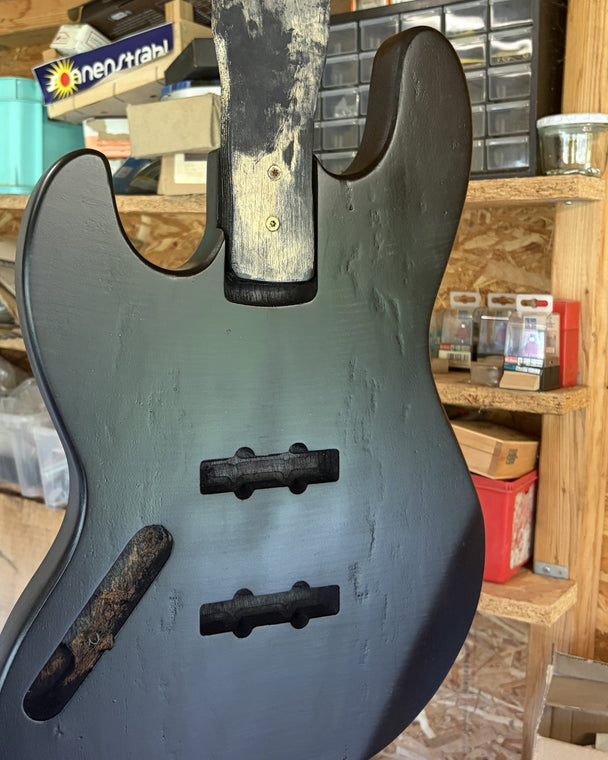
Hi Team, here are a few more pictures where you can see the issue more clearly. You can see that some of the pores are still lighter, even though I’ve already applied multiple coats of stain. I’m currently using suStain Charcoal Black No. 89 (concentrate) . I diluted it with water and applied it using a brush. Also, I wanted to ask how exactly you would recommend applying the grain filler for the best result. If you have any further tips on how to get it more evenly black, that would be great!
The edge of the body in raking daylight. The surface is black; the open pores are still pale. Courtesy of Christoph and Fionn Niebel.The same problem held up to the light. Two angles of one defect, which is exactly how to show a finishing problem to someone who cannot be in the room. Courtesy of Christoph and Fionn Niebel.
Why does black stain leave mahogany pores lighter?
Mahogany is an open-grained wood. Its pores are deep, open channels that sit well below the surrounding surface, and stain is a liquid. A liquid flows across the surface and evaporates before it ever settles into the bottom of a pore, so the pore floor stays close to bare wood color while everything around it goes dark. Adding more coats darkens the surface further and widens the gap. The fix is not a different stain or a heavier hand, it is a different material: a paste-consistency grain filler, tinted to match, that is worked down into the pores and levels them with the surface. Close the pores first, and the color goes even.
What Christoph and Fionn got right
Three decisions in this build are worth copying, and all three happened before any filler came out of the tub.
They stopped instead of repeating. The instinct when a finish looks uneven is to put on another coat, and then another. They noticed the problem was not getting better, stopped, and went looking for the cause. That single habit separates finishes that come good from finishes that get thicker and worse.
They photographed the problem properly. Look at those two close-ups again. Both are tight, both are in daylight, and both are taken at a raking angle so the pores read against the surface. That is why a specific answer came back rather than a generic one, and it is the most useful thing any builder can do when they are stuck.
They named their materials exactly. Product, concentration, dilution, application method, all in one message. Finishing advice is worthless without those details, because the right next step for a water-thinned stain is not the right next step for an oil-based one. They made it possible to help them.
And they chose the harder finish on purpose. Paint would have been quicker and would have hidden every one of these problems. They wanted the grain visible under the black, which means stain, then filler, then a clear topcoat, and they committed to all three stages. Our guide to choosing the right finish for your kit sets out which finishes carry that extra work, and wood grain filler for guitar bodies covers the material itself.
What they actually did
They switched to a black tinted grain filler, worked it into the pores across the grain rather than along it, wiped the excess off before it set hard, let it cure, then sanded it back flush so the filler stayed only where it was needed. Then the stain went back on over a surface that was finally flat.
The sanding step is where a grain fill is won or lost. Too little and the filler sits proud and grays the surface; too much and you pull it back out of the pores you just filled, and on a veneered top you risk cutting through. Our notes on sanding a guitar body prior to painting apply directly to that pass.
After filling and sanding back. The color is even across the face now, with none of the mottling from the earlier photos. Courtesy of Christoph and Fionn Niebel.
Then the update we were hoping for:
Yes it had worked good.
We are currently finishing the bass with clear nitrocellulose lacquer.
Clear lacquer over black, which is the ambitious choice
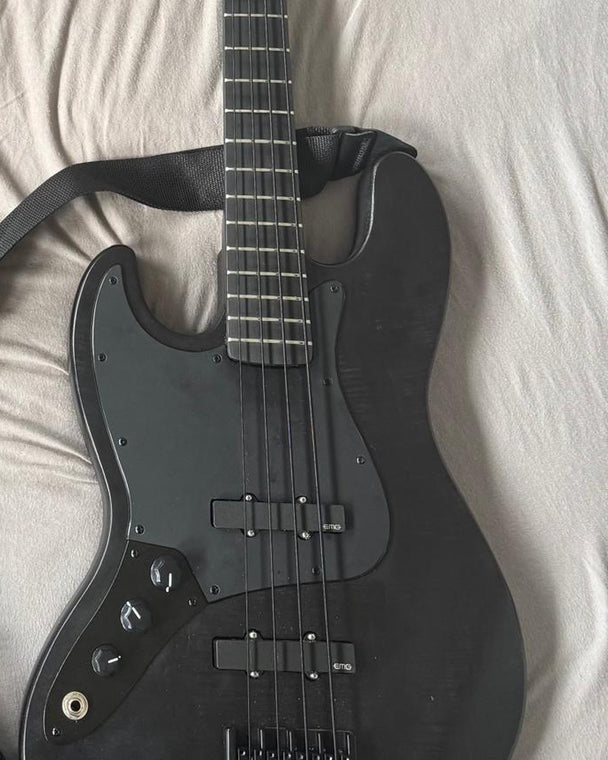
The finished left-handed bass. Black hardware, black pickguard, and the wood itself is the only thing breaking up the color. Courtesy of Christoph and Fionn Niebel.
Clear nitrocellulose over a black open-pore body is a quietly ambitious call. Paint would have buried the grain completely. Stain plus filler plus clear keeps the wood readable under the color, which is the whole reason to take the long route, and it is why the figure still moves across the body under the light. Compare it to the bare spalted top at the start of this page and you can see how much of the wood survived the black.
If you are working with lacquer, work outdoors or with real extraction and read our guitar finishing safety notes first. Solvent lacquers are the least forgiving thing most kit builders will ever spray. For the wider picture of how stain, filler and topcoat stack up in order, guitar finishing 101 lays out the sequence.
What you can take from this build
If a stain is drying unevenly in the pores, stop adding coats. More stain cannot reach a pore floor. Diagnose before you build up film.
Know whether your body is open-grained. Mahogany, ash and walnut want a grain filler for a level color. Maple and basswood generally do not.
Tint the filler to your color. A clear or neutral filler in a black finish leaves pale flecks exactly where you were trying to fix them.
Work filler across the grain, wipe before it sets, level-sand after. Across the grain packs the pores; along the grain skates over them.
Go carefully on a veneered top. Level the filler with fine grit and stop the moment the surface is flat. Coarse paper cuts through a veneer fast.
When you get stuck, send a close, daylight, raking-angle photo and name your exact products. You will get a specific answer instead of a general one.
Black stain and grain filler on mahogany: common questions
Why does black stain look blotchy or uneven on mahogany?
Almost always because the grain has not been filled. Mahogany's pores sit deep below the surface, and liquid stain cannot reach the bottom of them, so the pores stay pale while the surface goes dark. The unevenness is in the wood structure, not in your technique.
Do I need grain filler on a mahogany guitar body?
For a level, even color, yes. Mahogany, ash and walnut are open-grained and will show their pores through almost any finish unless you fill them. Maple and basswood are closed-grain and generally do not need it.
Can I just use more coats of stain instead of grain filler?
No. Extra coats darken the surface but cannot reach a pore floor, so each coat widens the contrast rather than closing it. You also end up with a thick film that is harder to level later.
Does grain filler go on before or after stain?
Sand and prepare the bare wood, stain the raw wood first, then fill the grain, then level-sand, then seal and topcoat. Filling before staining is possible but the filler and the stain can end up fighting each other for color.
What grit should I sand grain filler back with?
Fine grit, working up rather than down, and stop as soon as the surface is flat. On a veneered top especially, coarse paper cuts through faster than you expect.
Will clear lacquer over black stain still show the grain?
Yes, and that is the whole point of stain over paint. Clear nitrocellulose over a filled and stained body keeps the figure readable under the color, which you can see across this bass.
Beautiful work, both of you. That is a lot of patience, and it shows in the finish.
If you have stained an open-grained body: did you use a grain filler, and did you tint it or leave it clear? Tell us in the community, and post the photos.
Build one like it
Christoph and Fionn built the JM Bass Guitar Kit, available with a mahogany body and neck and in a left-handed configuration. You can see the rest of our bass guitar kits, and every model we offer for left-handed players is in the left-handed collection.
Building one of ours right now? Bring it to the Guitar Kit World community. Post the work in progress, not just the finished shot. The half-finished ones are the posts everybody learns from.
Another finish, another fix: when Steve Madden's white binding turned yellow under dye and oil, he scraped it back. Read his quilted maple build.
Bill Arico does not play bass, but he built his gigging daughter one that finally stopped diving, on an ash kit with a hand-rubbed oil finish. Here are the ultralight tuners that fixed the balance, the three parts that did not drop straight in, and what you can copy.
Finishing is the one guitar-building step you cannot undo. So Steve Madden practiced on six plywood bodies first, then gave his quilted maple kit five thin coats of Tru-Oil. Here is his method, and how he fixed the binding when it turned yellow.
Doug DeLuca and his sixteen year old son turned a bare quilted maple top into a deep blue burst, and the figure still reads through the darkest part of the rim. Here is the dye versus pigment decision that made it work, why the edges are the darkest part of the guitar, and what you can copy on your own figured top.

 Mark Maneja