Depending on your choice of guitar kit you may be required to perform a small amount (or a large amount) of work wiring the guitar. This typically involves a soldering iron and a basic understanding of guitar electronics. You will also need to be able to follow schematic diagrams of pickup configurations.
This can all get a little tricky and can become overwhelming especially if you have never tackled this type of job before. If this is the case, I strongly suggest starting with one of the easier models in regards to wiring e.g.TE-style kitsare significantly easier to work on as the scratchplate will often be pre-loaded with pickups.
However, if you purchase a kit guitar such as anL-style kit or you want to upgrade your electrical components (which is often the case with an entry-level kit) understanding some basics about guitar electronics is useful.
Watch this video instruction to learn how to wire an LP hollow style kit.
In the following, I will cover some basic terminology so that when we refer to tools or components such as capacitors in the following articles anyone new to building guitars will have a good idea of what we are talking about and what the purpose of the particular component is.
Commonly Used Electrical Components
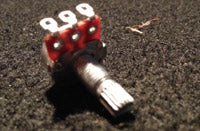
Potentiometers (Pots)
Pots in their most basic sense are DC resistors used to control the volume or tone of your electric guitar. They essentially decrease the amount of signal passing through the guitar. Decreasing the amount of signal in your volume or tone pot increases the amount of signal being grounded.
A basic overview of how they function might, the volume pot will receive a signal from the pickup selector it will then transfer this signal to both the tone pot and output jack. Pots can also come as 'blended' in which case it will control two pickups and may even have a toggle switch dedicated to just the one pot. This is much less common and won't play a role in assembling an electric guitar kit in most cases.
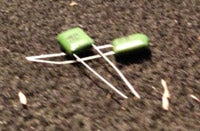
Capacitors
Capacitors are typically used as filters to control tone. In most cases, they are used to filter out very high frequencies before being sent to ground (the output jack) which controls the warmth of your guitar's tone. Capacitors vary greatly and come in a range of materials from ceramic, film, paper and electrolytic (mainly used with active pickups).
For now, just understanding why a capacitor might be included in your kit is probably enough information. But as your knowledge increases you may like to experiment with different capacitors to test the results they can have on your guitar's tone.
There's a great video below from Stewmac that provides an overview and demonstrates how different types of capacitors can impact tonal quality.
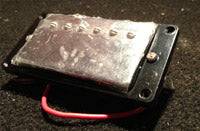
Pickups
Don't understand how pickups work or want to understand the difference between a single-coil and humbucking pickup? Rather than cover old ground, this article on guitar pickups provides an overview of how guitar pickups work and how they differ in tone.
Essentially pickups create a magnetic field that allows guitar strings to create a signal by displacing the magnetic field which can then be transferred from your guitar to your amp.
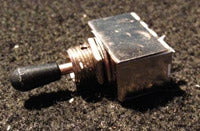
Pickup Selector
As the name suggests a pickup selector allows the guitarist to switch between pickups to influence the tone of what they are playing. For instance, a Fender Stratocaster typically has a 5-way pickup selector which allows for selecting each individual pickup along with combinations of each.
The video below demonstrates how pickup selectors work and will help you visualize things a little better.
Output Jack
The output jack is where you plug in your guitar lead. These are generally 1/4" and transfer the signal created by your pickups to your guitar amp.
They are usually connected from a ground wire and input wire. When the lead is plugged into the output jack the signal can be transferred. These can often be a source of trouble and need to be kept tight to reduce noise.
Commonly Used Tools
Soldering Iron
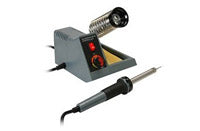
A soldering iron is basically a tool that allows you to transfer heat that in turn melts the solder which is used to join two pieces of metal.
The heat is supplied electrically (this wasn't always the case) and the soldering iron itself will have an insulated handle protecting you from the heat generated. For some useful tips on best practice for soldering click here: Common Mistakes to Avoid When Building an Electric Guitar Kit
Solder
Solder is basically a low melting alloy, which in a nutshell means it's melting point is far lower than the typical materials it will be used to join. It's melting range is generally between 200 to 800 °F.
Solder is available in either lead-based and lead-free. Most commonly you will use a 60/40 (60% tin, 40% lead) rosin core solder when working on guitar wiring.
Wire Cutting and Stripping Tool
Another fairly obvious tool but for the uninitiated a wire cutting tool allows you to cut the wire and strip the plastic casing away which is essential when dealing with guitar wiring.
Summary
Hopefully, that explains the basic components and tools. As mentioned guitar electronics can be a little daunting and my best advice if new to guitar electronics is to avoid seeking out information on guitar related forums as you may leave your head spinning, feeling more daunted than you did in the first place.
We will cover the basics here and in most cases that will be more than enough to help you put together a great guitar.
Cannot find a diagram for your kit? We will draw one for you
If you are building a Guitar Kit World kit, you will get a wiring diagram. Every time. Almost every kit we sell already has one in our wiring diagram library, listed by pickup layout and showing exactly which kits use it. If nothing there matches your electronics, send us photos of your control cavity, your pickups and your switch, and we will draw a diagram specific to your build.
Clear, well lit photos get a faster answer. We need to see the back of the pots, the switch terminals, and the wires coming out of each pickup.
Building a kit from somewhere else? Our builder community wiring section is open to everyone, whether you bought from us or not.
Need help with your wiring?
Every diagram in the library has a matching thread in our builder community where you can post a photo of your control cavity and get an answer from us or from another builder. Ask about wiring in the community.
As always if you have a question or would like to contribute please leave a comment below or contact us, we'd love to hear from you.
Finishing is the one guitar-building step you cannot undo. So Steve Madden practiced on six plywood bodies first, then gave his quilted maple kit five thin coats of Tru-Oil. Here is his method, and how he fixed the binding when it turned yellow.
Doug DeLuca and his sixteen year old son turned a bare quilted maple top into a deep blue burst, and the figure still reads through the darkest part of the rim. Here is the dye versus pigment decision that made it work, why the edges are the darkest part of the guitar, and what you can copy on your own figured top.
Christoph and his son Fionn wanted a deep even black on an open-grained mahogany body with the figure still showing through, and the pores kept drying lighter than the surface. Follow the build from the bare kit to the finished bass, and see how they diagnosed it and what you can copy from their approach.

 Guitar Kit World