Guitar Finishing 101: The Highlighted Grain & Stain Finish
There’s an endless list of choices available when it comes to guitar finishing. Options include oiling, staining, finishing in a graduated combination of colors e.g. sunburst to a standard solid color finish. To make matters even more complex, within these available options there are also any number of material considerations and methods of application to consider.
This is the method of finish I recommend if you are inexperienced or simply lack the equipment or required space for a spray finish as it requires very little in materials, time or technical know-how and can produce a great result.
Guitar Finish Types
First things first, you will need to assess whether your guitar is suited to this type of finish. As the name implies, the highlighted grain/stain finish is a tinted transparent finish that accentuates the grain pattern of your guitar and is sealed with a clear oil finish.
You can find the step-by-step video instructions from our Youtube Channel.
In the majority of cases, you should base your choice of finish on the characteristics of the timber your guitar is constructed from or choose the finish you are most interested in beforehand and order your guitar with this in mind.
Recommended: DIY Guitar Finishes: How to Choose the Right Finish for Your Guitar Kit
For example, if the timber is unevenly matched, has an uninteresting grain pattern or just doesn’t look great for any number of reasons it’s best not to showcase the timber, in which case a solid color finish will be best suited.
Alternatively, if you have a beautiful section of timber with a distinct grain pattern that is well matched it is often a good choice to showcase the timber of your guitar by applying a transparent finish.
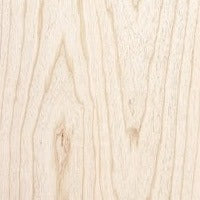
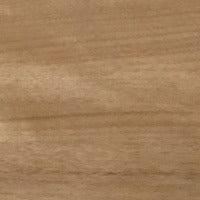
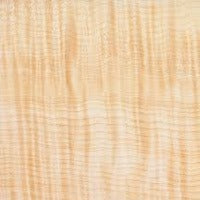
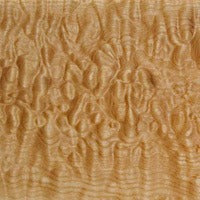
The highlighted grain/stain finish is best suited to guitars with a distinct grain pattern as those found on timbers such as Mahogany and Ash or guitars that include a figured maple cap or veneer such as Flamed, Quilted or Spalted Maple.
Recommended: How to Apply a Sunburst Guitar Finish
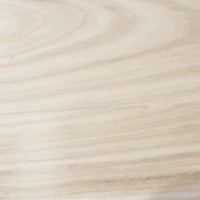
If your guitar has been crafted from Basswood, for instance, this method can still look great but is more dependent on the grain pattern of the specific section of timber your guitar has been constructed from. As a general rule, the grain pattern will be lighter and generally more uniform for Basswood bodies than other timbers.
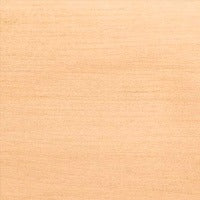
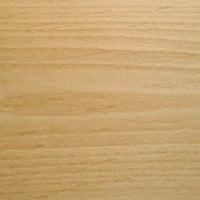
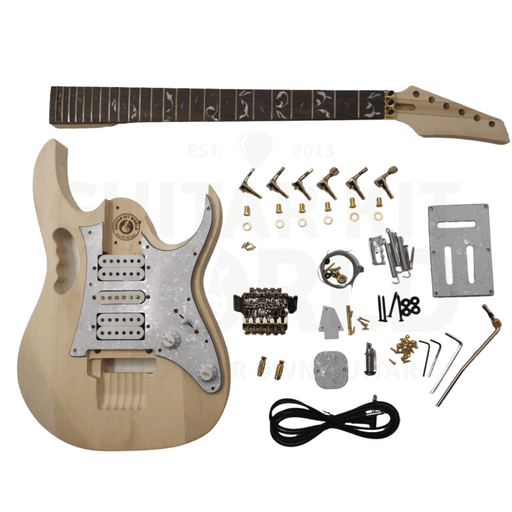
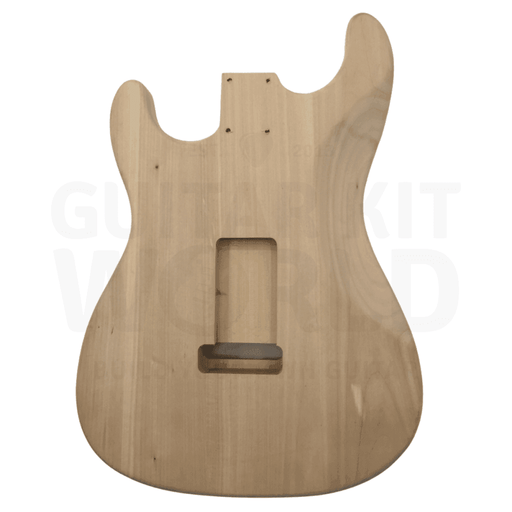
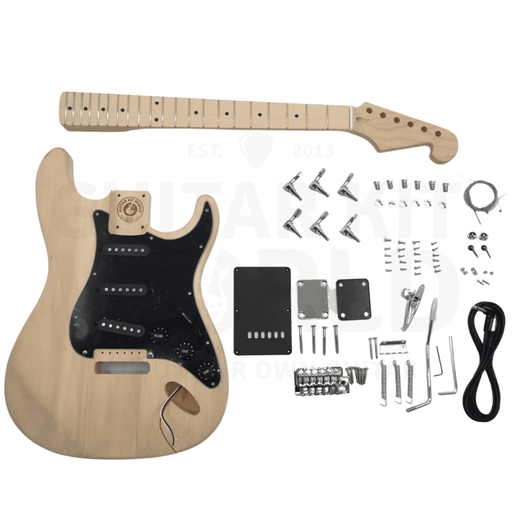
Examples of the most common timbers used for kit guitars is below:
Keep in mind timber (blanks) used for guitar construction are sold in grades, determined by the characteristics and perceived quality of the timber.
Recommended: Guitar Tonewoods: How they affect Tone and Playability
If the timber of your guitar differs in pattern and color from the examples above chances are you have a different grade of timber than that shown.
Take The DIY Guitar Quiz
Want us to recommend you kits and tutorials for your DIY project? Take this 2-question quiz to find out instantly which guitar kits and tutorials are right for your DIY project!
Guitar Finishing Materials
If you have assessed your guitar and believe that showcasing the grain is likely to produce a good result your next step is to source the materials you will require to complete the job. I have listed these below. Please note all materials listed below are available from all good hardware stores.
Ventilation mask
Sandpaper
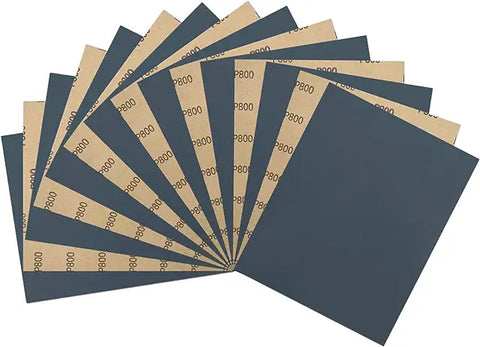
In the majority of cases, your kit guitar will be sanded to a reasonable standard for finishing but it is recommended you check the timber over carefully first and if any repair work is required purchase a lower grit paper. You will also require sandpaper for sanding your finish once applied. My recommendation is to pick up 2-3 sheets of 800 grit, 1200 grit (wet and dry) and 1500 grit (wet and dry) and some fine steel polishing wool.
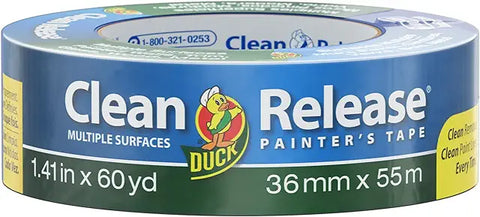
Painters tape
You will need to apply painters tape to protect your guitar’s fretboard and other features such as F-Holes (if you have assembled a hollow or semi-hollow body kit). You can also mask any binding should you require doing so, although I typically recommend scraping the binding afterward as I believe provides a better outcome. While many people also use masking tape I prefer painter's tape as it leaves less residue and results in cleaner lines.
Sealed Plastic Containers
In most cases, you will need to apply several coats of both stain and finishing oil. This will require that you utilize a container that can be sealed. It’s advisable that you have at least two of these available. It also goes without saying that the containers should be clean and free of any dust, grit or residue.
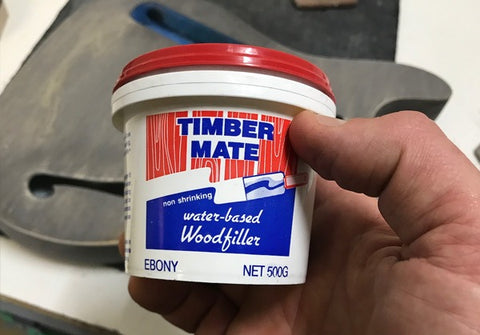
Tinted Grain Filler
For this particular finish, I recommend using a water-based tinted grain filler e.g. (Ebony) regardless of whether your guitar requires grain filling. As a rule, looser grained timbers such as Mahogany require grain filling, you can read more about grain filling here. It’s recommended you carefully inspect the guitar body before finishing and repair any dents or chips. In the case of dents, if small enough these can often be fixed with moisture and an application of heat. However, if the timber is chipped I’d also recommend picking up some clear timber filler for repairing the timber.
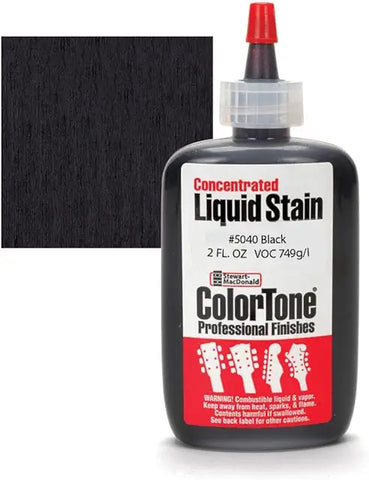
Stain
There are any number of options when it comes to selecting a stain. In you are purchasing your stain from a hardware store your options will be limited to the most common stains e.g. Teak, Mahogany, Japan Brown etc. that are used for furniture or decking. If however, you purchase your stain from a guitar finishing supplier such as reranch.com or stewmac.com you will have a range of options including colors specifically created for guitars.
Clear Coat - Wax or Oil
Spraying a gloss finish will provide you with a shiny, glossy look but in the majority of cases you will require a large well-ventilated workspace in the form of a spray booth or you will be required to apply the finish outside where overspill isn’t an issue. A far easier and faster method is to simply oil or wax the guitar. There are many options available that provide a beautiful matte or semi-gloss finish. If using a product such as Tung Oil it's recommended you let the stain dry completely. Consider leaving it for a couple of days and be sure to remove any excess.
Car polish and assortment of clean rags
The final step required is to polish the finish. I typically recommend using an automotive polish. If you have a buffer, either a purpose built buffer or a buffing tool than can be applied to a power drill (on a low setting) this will save you some time and in most cases provide a better result when it comes time to do your final polishing.
Recommended: Luthier Tools for DIY Guitar Kits
Guitar Finishing Step-by-Step
Now that you have acquired the materials listed above you should seek out a suitable work space to complete the job. I recommend a well-ventilated area with a workbench or suitably large area you will have sufficient room to work with and store your finishing supplies without being cramped for room as spills should be avoided at all costs.
Step 1: Inspect the timber and repair any dents or marks
While most kit guitars are inspected prior to packaging, accidents can happen especially when in transit. If you notice a dent in your timber there are a few methods you can use to repair the offending area.
Repairing dents and chips If you notice a dent but it is relatively small, in some cases dampening the area and using heat to expand the timber affected by the dent can fix the problem. I typically recommend using a soldering iron or heat gun pressed against a damp rag placed on the dent and applying gentle heat. Be sure to check the dent regularly and don’t apply the heat for any longer than just a few seconds to avoid leaving marks in the timber. If however the dent is simply too large or you are dealing with a chip as opposed to a dent your next port of call should be a clear timber filler. Simply follow the manufacturer’s instructions, apply the filler, wait the required drying time it dry and then sand it back level with the surface of the guitar.
Step 2: Final Sanding
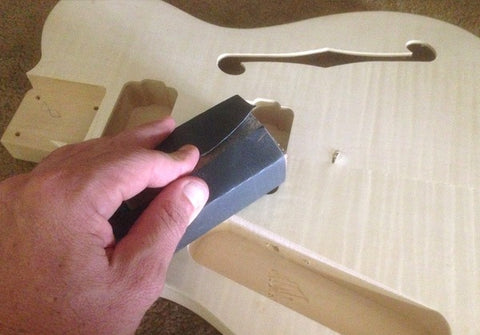
Your next step should be to sand the guitar. Look for any scratch marks left from the factory and sand until these are removed. If the marks are deep and require a low grit sandpaper you will need to work your way up to at least a 450 grit sandpaper once the scratch is no longer visible as each grade of sandpaper will leave scratch marks that must be removed with each higher grade of sandpaper applied.
Once satisfied with the surface, I’d suggest wiping down the body with a semi-damp rag as this will lift the grain and allow you to sand smooth.
Sanding down the edges One of the more challenging aspects to guitar finishing is avoiding sand throughs. This typically occurs on the edges of electric guitars. It’s advisable to gently sand back any hard edges. This should only result in a small miter which will help avoid sanding through your finish when it comes time to do your final sanding.
For a more detailed explanation of guitar sanding, please read our article on sanding a guitar body prior to painting.
Finishing Tips for Veneered Kits
If your kit includes a veneer top (like flamed, spalted, or quilted maple), it’s important to take extra care during prep and finishing. Veneers are made from real wood and often have thin, delicate layers that are easy to damage if not handled carefully.
⚠️ Note: These veneers are natural wood, not synthetic or printed. It’s common to see minor imperfections or distressed sections—this is part of their character. Handle with care to preserve their beauty.
DO:
- Inspect the veneer under good lighting for glue spots, blemishes, or imperfections that may resist stain.
- Sand very lightly by hand using 400 grit sandpaper. Just a few passes to smooth it—no pressure.
- Use a clean sanding block or sponge (no power tools!) to avoid burning through the thin veneer.
- Raise the grain by wiping gently with a damp cloth and then lightly sanding again with 400 grit.
- Consider masking edges or fragile spots if they look thin or distressed.
DON’T:
- Don’t use coarse sandpaper (nothing under 400 grit).
- Don’t use a power sander or press down while sanding—veneers are thin and easy to sand through.
- Don’t overdo grain filling—most veneered tops don’t need it and some fillers can muddy the figure.
Best Finish Options For Kits With Veneer Tops
- Stain or Dye to highlight the wood grain figure (flame/quilt).
- Translucent or clear coats like shellac or poly to preserve the pattern.
- Oil finishes like Tru-Oil also work well if applied in thin layers and gently buffed.
To learn more about finishing types we recommend reading the following guide: DIY Guitar Finishes: How to Choose the Right Finish for Your Guitar Kit.
Step 3: Final Clean
Once you have repaired any blemishes in the form of chips or dents and have sanded the guitar and have a nice even surface for finishing you should perform a final clean to remove any oils, grit or dust on both the guitar and your work area to avoid contaminating the finish.
For the guitar body itself, acetone is a good choice for wiping down the guitar, provided no paint has yet been applied. Alternatively, warm water with a small amount of detergent will also do a decent job. Once the guitar is clean and ready for staining I would highly recommend cleaning your work area carefully so that no dust will be disturbed. Use either a vacuum so that you are removing dust from the area as opposed to sweeping.
Step 4: Masking
It’s wise to mask off areas of your guitar that you do not want the finish to affect e.g. F-holes and the fretboard of the neck. To do this, simply apply painters tape to any areas of the guitar you wish to protect.
To ensure a flawless finish, take the time to tape off any areas of your guitar, such as the neck pocket, pickup holes and fretboard that don't need finishing.
Step 5: Highlighting the Grain
Now that the guitar is ready to apply your finish it’s time to use either your tinted grain filler or dark stain to highlight the grain of the timber. You can read more about mixing grain filler here. It’s always best to test your mix on a spare piece of timber first if available and then simply apply the product and wait for it to dry.
The basic idea is by working a dark stain into the grain it will highlight the grain more effectively by providing greater contrast.
Step 6: Re-Sanding
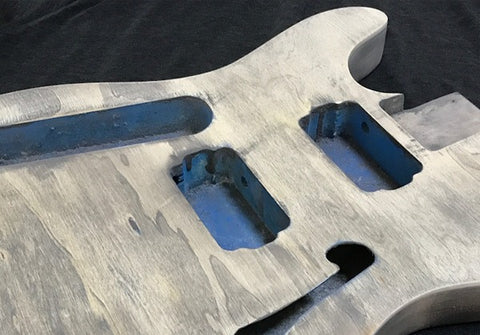
Once the stain or tinted grain filler has dried it’s time to remove the excess by sanding again. First, remove the painter’s masking tape you applied in the previous step and then begin sanding.
Try to use at least a 450 grit paper to avoid any deep scratch marks and simply remove any excess stain or tinted filler.
Once satisfied repeat step 2 to ensure your guitar is ready for staining and re-apply painters masking step prior to staining.
Step 7: Staining

Now that we have a surface ready for finishing and have highlighted the grain it’s time to stain the guitar. For the most part, this is fairly straightforward but there are a few considerations to keep in mind.
- Follow the manufacturer’s recommendations for mixing.
- If your guitar has a veneer maple top e.g. most LP-style Guitar kits come with a thin maple veneer you will need to be careful to only apply the stain very lightly. If you saturate the veneer it can start to bubble which will result in the veneer being required to be completely removed and requiring you to perform many of the steps listed above over again.
- Always use a clean rag. While it may seem obvious that using a rag that has been used for other purposes previously is a bad idea e.g. I have known of a signwriter who mistook a clean rag for a previously used rag that had been exposed to paint thinners and caused a number of problems.
- Your hand should be constantly moving to achieve an even finish. If you use inconsistent hand movements it is likely that your stain will look heavier in some section than others which should be avoided at all costs.
To apply the stain utilize a clean rag and bunch it into a ball. Ensure that there are no seams on the section of rag you intend to apply the stain and if needed tie a small piece of string around the lower half to ensure the ball shape remains in place.
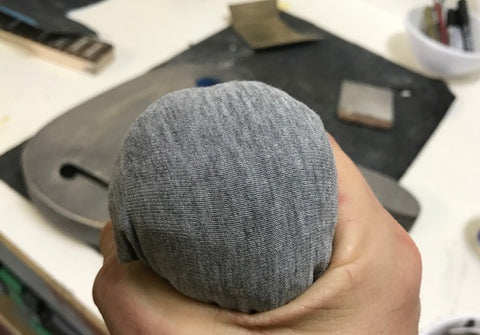
Unless utilizing a handle and hanging space you will need to first apply the stain to the top and sides, wait for it to dry and then apply the stain to the back of the guitar. The same goes for your neck. If however, you prefer to stain the body and neck in its entirety (recommended) it’s wise to fashion a small handle that can be screwed in place to the neck cavity. You can also add a hanging hook to this handle or the predrilled strap button holes for hanging the guitar once stained to allow it to dry.
Repeat the process until you are happy with the depth of color. In the majority of cases, I have found at least 3 coats will ensure a nice finish. Once done, leave the guitar body and neck to dry as per the manufacturer’s recommendation on the finishing product.
Step 8: Scraping the Binding

This next step is only required if the guitar has binding and if you opted against masking the binding with painters tape. Scraping the binding is how the majority of professionals take care of guitars with binding and it’s the method I recommend you also use. Just be prepared to spend some time on this step to avoid scratching the surface of the guitar.
The method itself is simple but the execution is moderately difficult. The best method I have found is to use a hobby knife and extend only a very small section of the blade e.g. roughly the width of your binding and gently begin to scrape any product on the binding.
Step 9: Finishing the guitar body with Tung Oil, Wax or Buffing Oil
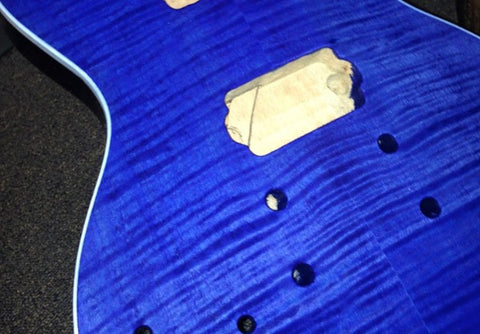
Lastly, you will want to apply a clear finish. There are two reasons for doing this. Firstly, the clear finish seals the timber and provides the nice oiled, semi-gloss finish that appeals to most guitar owners and secondly the clear coat will help protect the surface of the guitar.
The oil is applied in much the same way as the stain. First, use a new completely clean rag and bunch into a ball as you did in the previous step. From there simply apply the finishing oil lightly to avoid any runs. Repeat the process as many times as required. For the guitar below I applied 5 coats of clear finish, waiting approximately 40 minutes between each coat.
Step 10: Final Sanding
Next we will perform a final sand of the surface to achieve a professional looking finish. As explained previously the purpose of sanding to remove blemishes and as we utilize finer grades of sandpaper in succession, you will remove the scratch marks left by the previous heavier grit paper.
It’s best to use a wet and dry sandpaper for final detailed sanding. Wet and dry sandpaper is more effective if left to soak in water overnight. So, the day before you plan your final sanding, cut the wet and dry paper into sections you intend to work with and leave soaking overnight in a bowl of water.
Once your sandpaper has been left to soak overnight you can begin the final sanding.
Start with your heavier grade sandpaper e.g. 800 grit and work your way all the way up to 1500 grit wet and dry paper. Be sure to hold the body of the guitar up to the light and observe the finish from a variety of angles as lighter scratches will only be visible from certain angles depending on the source of the light.
Keep sanding until you are satisfied with the surface of the guitar and finish up by using the fine grade steel wool.
Step 11: Polishing
Lastly, we will cut and polish the finish. This is performed in much the same way as polishing a car, simply apply the polish with one rag and then utilize a fresher, clean rag to work the surface of the guitar and remove excess polish. Keep working on the guitar until you are completely satisfied with the result as this is the last step.
Summary
While the information above may seem detailed, rest assured this is one of the most effective and simplest ways to achieve a great guitar finish. Guitar finishing can be complicated, especially if attempting a spray finish. If you are new to building kit guitars I’d recommend attempting the method outlined above as it requires significantly less technical expertise, time and equipment and in my opinion anyone can produce a great result following the steps listed.
Also Read: Some Important Guitar Finishing Safety Tips That You Must Follow
All the best with your guitar finish! And be sure to send us a photo of your completed job and we’ll be happy to add it to our upcoming customer gallery.

