Sanding a Guitar Body Prior to Painting
In the following article, we're going to cover some of the basics of guitar sanding. While it may seem fairly obvious, in essence, correct preparation will make or break the quality of your guitar kit's finish so it makes sense to take the time to do the job properly. Just like in a recording studio it's much more difficult to fix a problem down the track so take the time, be patient and you will achieve a great result.
Let's start by breaking down some of the basic elements:
- The purpose of sanding is to remove imperfections and machine marks which affect your finish.
- You should always sand with the grain and not against it.
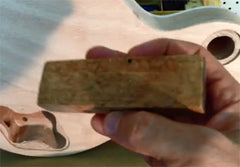
- Use a non-flexible sanding block to ensure a level surface. (Keep the sanding block level).
- On contours use a flexible sanding block
- Use at least 3 grades of sandpaper prior to painting (rough, medium and fine).
- When sanding curved edges, only sand in one direction.
The purpose of sanding is to create an ideal surface for finishing and to do this we need to create a smooth surface. You want to work with the grain so sand in the direction of the grain (back and forth with the grain) never sideways. However, the grain on the edges of your guitar will run in another direction, in this case always sand in one direction and not back and forth.
Watch this video tutorial to have better understanding of how it's done.
The Work Area
We have spoken about your work area in our Guitar Finishing Safety article so we won't go into much detail in this article, suffice to say you want a clear area and your guitar should be protected by either cardboard beneath or ideally carpet. Just be careful if using a carpet that anything that could scratch your guitar e.g. grit, screws, shards of metal are removed to ensure you don't get any scratches.
The reason I prefer carpet is the guitar can be set down and in most cases, won't move regardless of how much force you are applying when sanding.
Getting Started
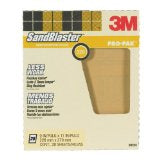
- When it comes to sandpaper the lower the number the heavier the grit. In most cases start with 120 grit course sandpaper. The main purpose of this heavier grit is to remove scratches, bumps, and dents. This isn't going to provide you a detailed finish but will set you on the right path to achieve this with your finer grit sandpaper.
- Once satisfied you have removed any blemishes change over to 220 grit sandpaper which is mainly about removing the minor scratch marks from the 120 grit. (This is actually an important part of the process to consider, with each finer grain sandpaper you are essentially removing the scratches from the previous sandpaper. This is a natural process and once the guitar is finished will continue with much finer sandpaper, finishing in some cases with steel wool followed by buffing and polishing to remove the minor scratches from the finer grain paper).
- Following on from the 220 grit sandpaper you should move on to 320 grit which is going to really start smoothing out your guitar body. Once you have finished with the 320 grit it's a good idea to dampen the timber a little with a rag. Doing this will lift any loose grains and allow you to sand flat.
Sanding Blocks

You should ALWAYS use a sanding block on the flat surfaces of your guitar. Don't use a rubber block or something flexible, as all that will happen is the block will expand and allow for bumps on your timber and simply smooth them out rather than remove them.
Always use a hard sanding block. If however, you are sanding a guitar with plenty of contours you should use a flexible sanding block as the contours will make it almost impossible to do a good job with a rigid sanding block.
Also Read: Some Important Guitar Finishing Safety Tips That You Must Follow
Some tips for Effective Sanding
- Keep replacing your sandpaper once it becomes clogged with grit. Continually clean the sandpaper while using it and once it becomes clogged up replace it immediately. This will not only save you time but will result in a better job.
- When sanding the edges of your guitar or tricky areas of the neck remove the sanding block and simply drag the sandpaper through your fingers against the surface. This is more time consuming but will result in a better finish and allow you more control.
- If you are priming first this will lift the grain a little so don't worry too much if the surface is affected. Simply give it another light sand using your fine grit (320 grit) sandpaper.
- Once satisfied with your work be careful to remove all sanding dust and grit with a damp cloth or if you prefer some denatured alcohol.
Let us know in the comments if you have any questions.

