Wood Grain Filler for Guitar Bodies
All hardwoods are fairly open grained, some more than others. To achieve a smooth glossy finish we require an even surface to work with and when using an open grain timber such as Mahogany this can be difficult. To achieve this the open pores of the timber should be filled using wood grain filler. It's not a difficult job but there are a few basic steps to keep in mind which we will outline below.
What is Wood Grain Filler?
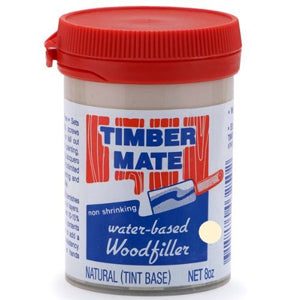
Grain filler is made up of three basic ingredients. Firstly there is the binder which is acrylic in water-based grain fillers. Silica as a bulking agent (ideal because it won't shrink depending on the temperature of your work environment) and the solvent which in water-based grain fillers is obviously water.
Grain filler is not to be mistaken with timber putty. Although handy to have around when working on kit guitars, putty is better suited to repair work due to its relative density compared to that of grain filler. For example, fixing a heavy mark or a poorly placed screw hole that requires filling.
Recommended: Guitar Finishing 101: The Highlighted Grain & Stain Finish
What Grain Filler Should You Use?
It comes down to what you prefer to work with but in my own experience, it's not a bad idea to stick with water based grain filler as it's less messy and dries quickly. Purists may disagree but in my opinion, water-based products have come such a long way in recent times that it really makes little difference choosing water based or oil based fillers, paints and stains for the most part anymore. You can generally purchase grain filler in clear or tinted variations.
You can also add a water-based pigment to achieve the color you prefer. It's best not to overdo things though as you can effect the drying time if you use too much. If in doubt use no more than 10%-15% pigment.
Another great advantage to using a water-based grain filler is you can still stain the guitar after you have applied it. All grain filler will have an impact on the surface color of your guitar body so this allows for a more controlled staining option if done after the grain filler is applied.
Grain Filler Application
If you do require a grain filler to be applied first mix up a batch in a separate container. Start by adding about 10% water straight to the container. Grain filler doesn't have a use by date so you can seal the container leaving the excess you didn't require. To re-use at a later date just add more water. Once mixed into a paste you can simply apply with a rag. You can also brush it on or use a scraping tool but a rag also works well.
You will need to really work it into the timber to achieve a good result. Do this by first rubbing firmly with the grain and lastly rubbing against it to really work the grain filler into the timber pores.
Once you have worked enough grain filler into the timber you can start to scrape away any excess. Be sure to scrape the filler away quickly as water-based grain filler dries very quickly once not being worked with the rag. Wood grain filler also tends to dry quite hard, meaning you are going to raise a sweat if sanding too much excess of by hand.
Recommended: Some Important Guitar Finishing Safety Tips That You Must Follow
Once done, you can begin sanding the surface to get that glossy, smooth look perfect for applying a paint or stain.

