
Looking for a Specific Guitar Kit?
Type in a model or style to see what’s available.
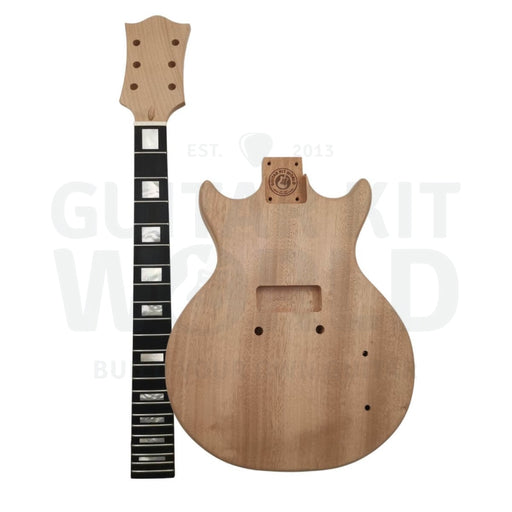
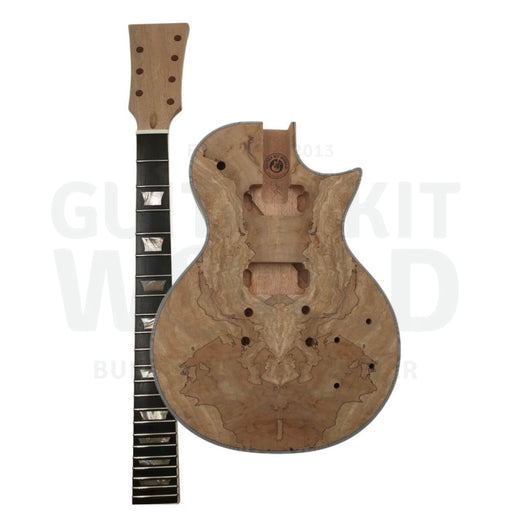
Our single cutaway guitar kits deliver the thick, sustaining tone that has driven rock, blues, and hard rock for decades. The combination of a mahogany body, a carved maple top, and a glued-in set neck produces a warm, fat sound with plenty of midrange punch. Add two humbuckers, and you have a guitar that roars when you dig in and sings when you back off.
The single cutaway design is one of the most iconic shapes in electric guitar history. The arched maple top adds visual depth and tonal brightness to the warm mahogany foundation. Our kits include the carved top already shaped, so you are not starting from a flat slab.
Each kit includes a mahogany body with a maple top, a set-neck mahogany neck, two humbucker pickups, a tune-o-matic bridge, a stop tailpiece, and all electronics. Set-neck construction requires a careful glue-up during assembly, which makes this kit an ideal next step after you have completed a bolt-on build. The payoff is a tighter neck joint, more sustain, and that unmistakable thick tone.
Build your own double-cutaway body classic junior body DIY guitar using this Custom Shop guitar kit. Choose your own body, neck, and fretboard tone...
View full detailsDescription: Body type: Solid LP-style Neck Shape: C-shaped Number of Frets: 22 Scale Length: 628 mm (24.75″) Cutaways: Single Pickups: 2 Standard...
View full detailsL-style 7-string guitars expand your range when it comes to available chord voicings and tunings allowing you to play seriously down-tuned riffs wh...
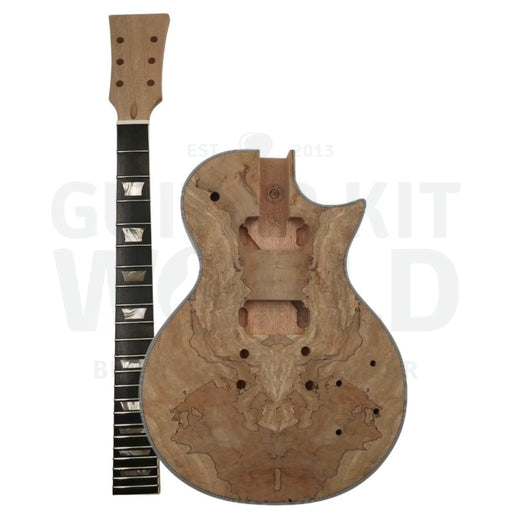
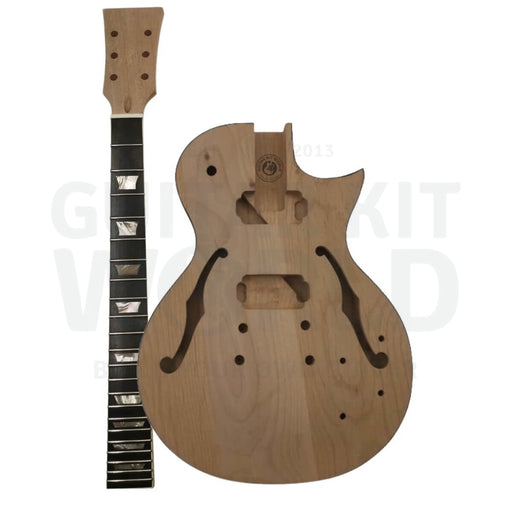
View full detailsBuild your own LP-style hollow body DIY guitar. This DIY guitar kit can be customized according to your taste and playing style. Customize hand-ori...
View full detailsThe neck is glued into the body pocket rather than bolted, which creates a more rigid connection and transfers vibration more efficiently for better sustain.
Some kits feature a flame or quilted maple veneer on top, which looks stunning under a translucent finish. Plain maple tops work great under solid colors.
Standard kits include dual humbuckers with a three-way toggle switch. The bridge humbucker handles high gain and crunch, while the neck position delivers smooth leads and warm cleans.
Mahogany bodies with maple tops can be heavy. Some builders prefer weight-relieved models if you plan to play standing for long sets.
Some single cutaway kits include body and neck binding for a more polished look. Binding requires careful masking during finishing but adds a lot of visual appeal.
It requires more care than bolting on a neck, but it is not as difficult as it sounds. Dry fit the neck first, apply wood glue evenly, clamp firmly, and let it cure for at least 24 hours. The key is taking your time with the fit.
The mahogany body and set-neck joint produce a warmer, thicker tone with more midrange. The humbuckers add output and reduce noise. An S-style is brighter and snappier with its single coils and bolt-on neck.
Yes, and it looks fantastic. Use a dye or tinted lacquer over the maple to let the grain show through. Flame maple tops are especially striking under amber, cherry, or tobacco burst finishes.
We recommend completing a bolt-on kit first if you have never built a guitar. The set-neck glue-up is the main added challenge. If you are comfortable with woodworking basics, you can start here.
Depending on the type of guitar you buy you may only require tools and materials for finishing the guitar (painting) and soldering.
Screwdrivers, sandpaper and sanding block. Finishing supplies e.g. paint, stain, and clear gloss, ventilation mask, coping saw or jigsaw if shaping the headstock.
With this small list of inexpensive tools, you will be up and running and ready to build your electric guitar in no time.
Recommended reading: Luthier Tools for DIY Guitar Kits.
Our stock kits contain all necessary parts (unless stated otherwise on the product page).
It depends on the choice of finish. For instance, when you paint or stain a guitar you will need the surface to dry and harden (cure). This can take anywhere from 1 week to 3 months depending on your choice of finishing product.
You will find the guitar dries to approximately 90% very quickly but the final 10% takes some time. If you can't wait that long you could try tung oil or wax finish but bear in mind the finish won't be as durable and protect the guitar as effectively.
Most of our kits require basic soldering. If you're new to it, check out our wiring guide here.
If you don't want to solder, or don't have the tools, our solderless guitar kits use plug-and-play wiring. No iron required.
You can use stain, paint, or oil-based finishes. Learn more about finishing techniques here.
Our advice: use a reference. In most cases, this will be a guitar you particularly like the look of and want to create something similar.
To view the latest DIY guitars from our community follow us on Instagram and visit our Customer Reviews page.
It's defined firstly by the components you use and secondly the workmanship that goes into putting it all together.
Watch the community section of our YouTube channel to learn how kit guitars sound.
Type in a model or style to see what’s available.