One of the most obvious reasons a guitar may not play well comes down to a bent or warped guitar neck. Guitar kits will often require some truss rod adjustment after assembling. Adjusting your neck is often essential to provide a good playing experience.
Depending on the severity of the problem most of the time this is a relatively straightforward task. It's actually a very handy technique to learn because along with a few other skills such as adjusting your action and setting your intonation correctly can save you money getting your guitar properly set up.
If you follow the simple steps outlined below you will be well on the way to being equipped to deal with a bent or warped neck in the future on any guitar.
What you will need
Straight edge
Allen Key
Screwdriver (Phillips head)
Technical Terms
Truss Rod
These have been around since the early ’20s. A Truss Rod is the adjustment bar inside your guitar neck, also referred to as a tensioning bar. Its sole purpose is to allow you to adjust your guitar neck against the pull of your guitar strings.
The video below provides a great overview of what a Truss Rod is and the purpose they serve. Be sure to check it out as it will help you understand your guitar neck better.
Bending and Warping
When we refer to a bent neck typically we are talking about a guitar neck that has a forward bend. A warped neck is often referred to as a neck that has a backward bend, less common but still very much an issue.
Hot Tip
Leave your strings on when performing a Truss Rod Adjustment. Some people recommend removing your strings but when you do this you are removing all tension from your guitar neck, hardly the most accurate way to repair a bend in your neck! You may need to remove or loosen your G and D string to access the Truss Rod but try to leave the other strings on and relatively close to concert pitch.
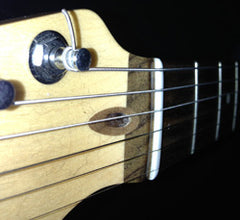
A Strat-style guitar kit - minus truss rod cover
Check your Head Neck
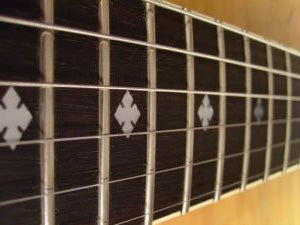
First things first, check there is even a problem. Make sure your guitar is in tune and then lay your straight edge down on your neck and check the straightness of your neck. If you don’t have a straight edge I recommend you get one, especially if you plan on building a few guitars.
If you do see a problem then you will need to make some adjustments, it’s important to remember that not all guitar necks are going to be dead straight nor should they be, there is an acceptable bend allowable in some necks. Electric guitars typically allow you a straight neck, acoustic guitars on the other hand generally cater for a small amount of neck bend to reduce fret buzz on the first and second frets.
Getting started
Before you start it’s important to remember we are not trying to adjust your guitar's action but rather improving the playability. The first step will be to find your truss rod cover and remove it so that you can make the necessary adjustments. This can be found at the base of your neck under the strings between the nut and headstock. You will require a screwdriver to remove the screws to allow you access to the truss rod (On Strat-style guitar kits the truss rod isn't often covered).
Once you have removed the Truss Rod cover check you can access it by using your allen key. You may need to remove your D and G Strings to get good access to the truss rod.
Straightening the Neck
Next lay your straight edge down and test the straightness of your guitar neck again. Typically you will be dealing with a slight to moderate warping of the neck and it is important to remember to tread carefully.
If you take things too far you can risk breaking the truss rod! It’s much better to make minor adjustments and then check the results.
Most of the time the neck will be bent inwards e.g. the lower point will be in the center of the neck, this means your truss rod will need to be loosened which requires turning the allen key away from you. If it is warped (bent the other way) this can be a sign of a bigger problem but the same principle applies in reverse. So turn the alum key towards you but remember only slight adjustments at a time e.g. 1/8 of a turn at a time.
Checking the Adjustment
Lay down your straight edge again and check your truss rod adjustment. If the neck is still bent continue making minor adjustments. If however, your neck appears to be straight then put the guitar down on a flat surface and grab a coffee or chill for ten minutes, we need to let the neck settle before the job’s done.
Once the neck has settled check again and all things being as they should re-attach your truss rod cover (if required) and tune your guitar back up and enjoy your new straight neck. It’s a good idea after doing this to test your intonation as well which we covered in our "How to Adjust Your Guitar Intonation" article.