It can be a real source of frustration to find a dent or chip on your guitar kit’s body or neck. And, while it may seem impossible to fix all is definitely not lost. In the following article, we’re going to take a look at some methods you can use to repair dents on your guitar kit along with some additional options for repairing chips in unfinished and finished guitars.
Dents and chips, what’s the difference?
Before we can begin the repair process we first need to identify the problem as we will use different methods for dealing with dents as opposed to chips.
Dents
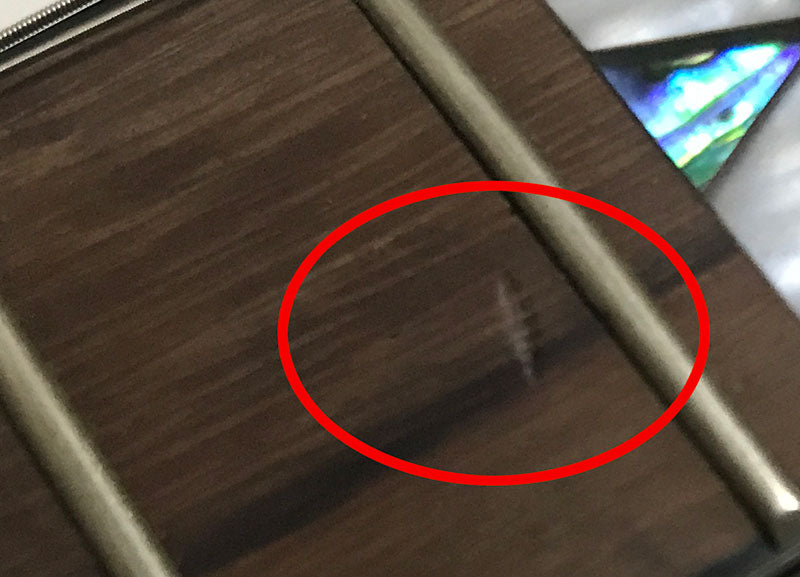
The image below shows a dent on this otherwise beautiful rosewood fretboard.
Dents for those unaware are indentations in the timber of the guitar. The wood grains are not broken which means the timber has been compressed rather than a section removed.
Chips
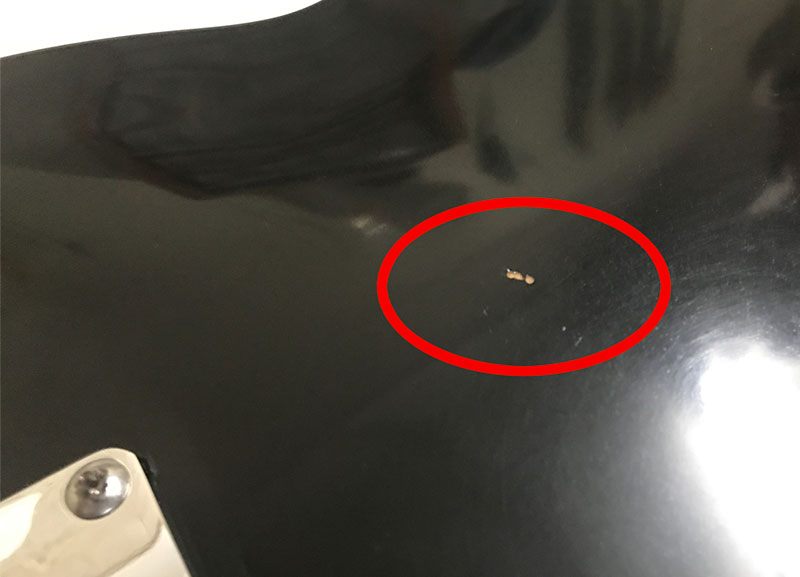
A chip occurs when a section has been completely removed. You can identify chips in unfinished timber as the grains of the timber will be broken and look torn.
In finished guitars, a chip is easier to identify and will usually only have affected the finish leaving the timber beneath unaffected, as per the image above.
This is one of the main purposes of a guitar’s finish, to protect the timber of the guitar along with being pleasing to the eye.
What causes chips and what causes dents?
Dents and chips are typically the results of force e.g. an impact on the guitar e.g. something is dropped on the guitar’s body or neck or the guitar itself has been dropped onto something hard e.g. an edge of a workbench.
The amount of force or hardness of the object the guitar has come into contact with usually determines if the guitar has a dent or has been chipped.
Dents are usually much easier to fix and are more common than dents in unfinished timber, while chips are more likely to occur after the guitar has been finished.
Repairing Dents in Guitar Kits
As dents are caused by compression, ultimately we need to decompress the dented area to return the guitar to its previous state.
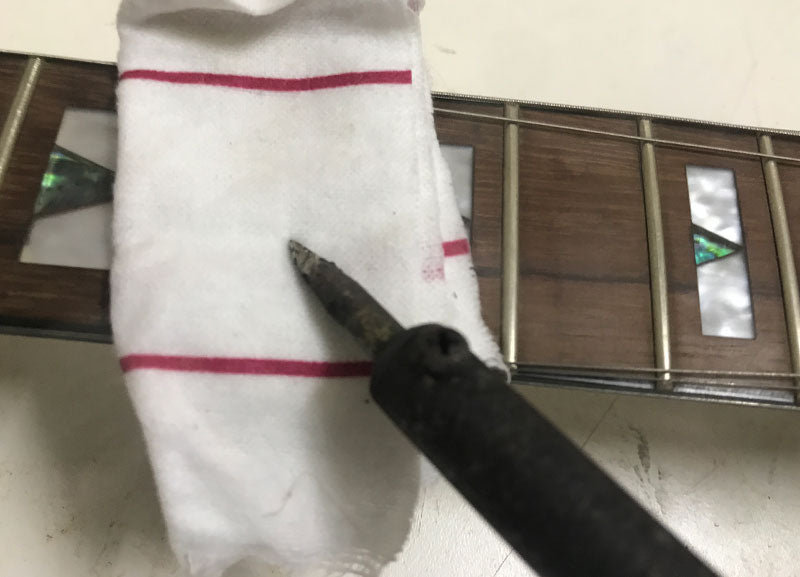
This is best done using a combination of moisture and heat which can be applied using a clean rag and soldering iron.
This method is effective on unsealed timber e.g. unfinished guitar body or a fretboard. However, a sealed guitar body is less likely to suffer a dent in the first place due to the protection the seal coat offers. If you are working with a guitar that has a sealer coat applied lightly sand the sealer coat away in that specific area and apply again once completed.
Switch on your soldering iron and allow it to heat up
Dampen a clean rag. It shouldn’t be dripping wet but should be damp.
Fold the rag over itself 2-3 times to ensure the direct heat from the soldering iron will not be in contact with the timber and cover the dent with the damp rag.
Apply heat to the affected area until the rag is mostly dry. Don’t hold the soldering iron in one place for too long. Think more about applying heat to the area rather than pressing hard against the dent itself.
Check your work, and reapply if necessary.
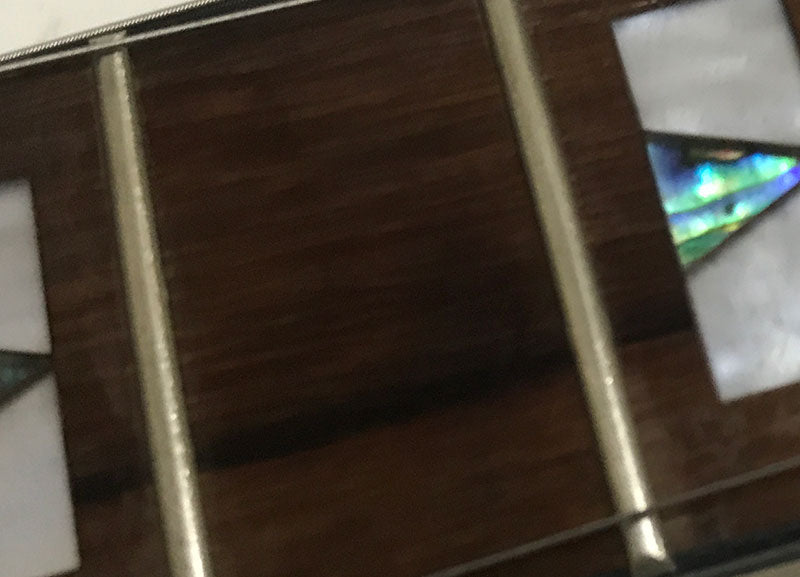
As seen in the image above the dent has now been completely removed. This only took around 1 minute of applying heat to the damp rag. Deeper dents will take longer.
In some instances dents can be much deeper than the example above. If this is the case try the method above first but if unsuccessful consider filling the dent using a tinted filler.
Repairing Chips in Guitar Kits
As previously mentioned the majority of chips found on guitars occur after the finish is applied. In this case, we are actually repairing the finishing coats rather than the timber which requires a drop fill.
Depending on how your guitar is finished this will determine the approach we take. For instance, if the chip is only affecting the clear gloss coats (if you have used a clear coat to finish the guitar) we can use superglue which bonds nicely with most finishes. Followed by scraping and sanding flat.
If however the color coat has also been affected we need to fill the chip with the matching color used to finish the guitar, before proceeding on to repairing the seal coat.
This might represent a problem if repairing a standard electric guitar as the finish will be difficult to match. But fortunately, as we are repairing a guitar kit there’s a good chance you have some finishing supplies leftover or can source more of the same color you previously used.
If on the other hand, the dent has occurred to an unfinished guitar body try to source a filler that is a close match to the unfinished timber, there are various tinted fillers available. When finishing the guitar e.g. staining or painting any change in appearance as a result of a less than perfect match will be less obvious or unable to be seen if finishing in a solid color.
Finishing product e.g. either the matching color used on the guitar if repairing a color coat. Superglue if repairing a clear coat or tinted filler if repairing an unfinished body.
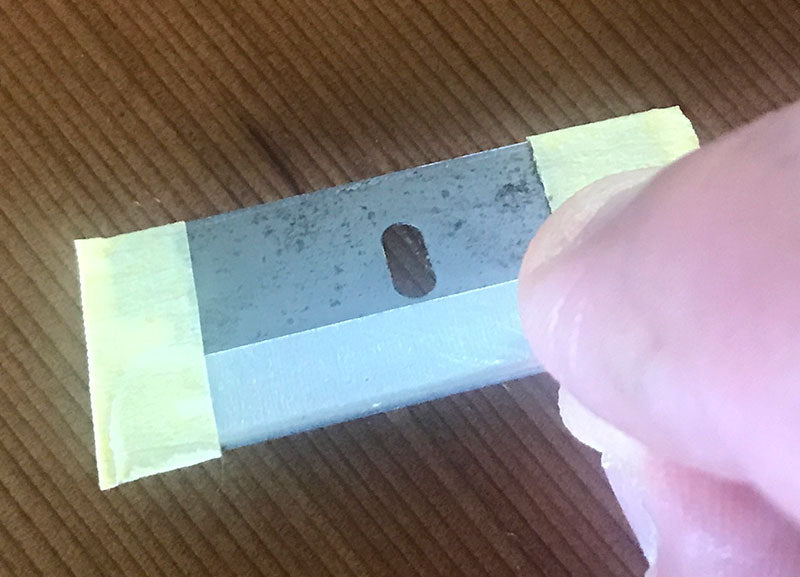
Burr the edge of a razor blade by running it against a metal object. The small burr created will be used to drag back over the fill and help create a smooth finish. *This is a tip from master guitar repairer Dan Erlewine.
Wrap the outside edges of the razor blade with masking tape to allow the blade to sit slightly higher than the surface of the guitar, as per the image above. This allows the finish to be scraped flat while preventing the blade catching on the body and scratching the surface.
Clean the area the dent has occurred with a clean rag and if necessary use a small sharp blade to remove any loose materials on the outside edges of the chip. The chipped area should be completely free of any loose debris.
Fill the chip with the matching color using either a syringe or a similar item.
If repairing a clear coat apply a small amount of super glue to seal the chip directly over the previous layer. The finish should sit slightly above the surface of the guitar body.
Allow to dry.
Drag the razor blade over the raised area. You won't need to use a lot of force, the blade will be sufficiently sharp enough to begin removing much of the excess.
Lastly, sand down the affected area working your way through the various grades of sandpaper until no visible scratch marks are remaining and finish by polishing the affected area.
Summary
Knowing how to fix dents and chips on guitar bodies is a valuable skill especially if you plan on building more than one guitar.
As can be seen above the methods used are straightforward and don’t require specialist tools or experience. So, next time you spot a dent or chip on your new DIY guitar kit remember all is not lost and in most cases, it’s more than possible you can have the guitar looking as good as new without too much trouble.
Build Your Next Guitar from Scratch
Once you've mastered repairs, why not take on a full build? Our DIY guitar kits come with everything you need, including step-by-step instructions. First-time builders should start with our beginner-friendly kits.
 Marty Banner
6 min read
Marty Banner
6 min read