Free Shipping
on orders over $45*
on orders over $45*
Far more than just ‘the final touch’, the finish of your guitar can not only make or break the appearance of your guitar entirely, it also serves as a last line of defense in protecting the guitar.
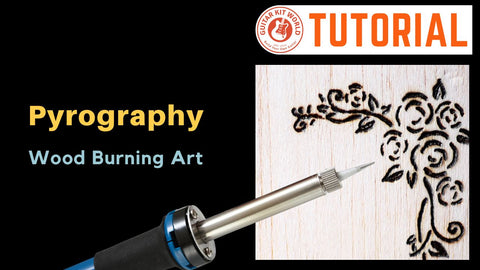
Once you pick a finish, check out these guides:
Because the finish plays such a pivotal role, if you’ve never finished a guitar before, there’s a lot you really should know, and consider before making a final decision on your choice of finish, including:
So, with this in mind, today we’re going to discuss each of these factors in greater detail, but first we’ll take a closer look at some popular finishing options kit guitar builders can choose from in the table below.
Keep in mind many of the finishes mentioned below can work in combinations e.g. a solid color + gloss or satin finish or stain finish with gloss clear coats.
Popular with those who appreciate the natural beauty of wood, as it accentuates the natural woodgrain without introducing color.

Accentuates the natural woodgrain while adding color.

A uniform color applied across the entire guitar.

Provides a smooth, non-reflective surface. Tends to be more forgiving e.g. may hide surface flaws.
A high-shine, reflective surface achieved with multiple clear coats.

A gradient finish transitioning from a lighter center to darker edges.

A finish with metallic flakes that give the guitar a shimmering, reflective quality, often in silver, gold, or metallic blue.
Mimics the look of a well-used, aged guitar by distressing the paint and hardware.
Personalized artwork or designs applied using various techniques.

Finishing is essentially a series of choices, and the first decision you need to make involves choosing between a solid color or a transparent finish.
This typically depends on the aesthetic appeal of the wood (and wood grain pattern) used for the guitar body.
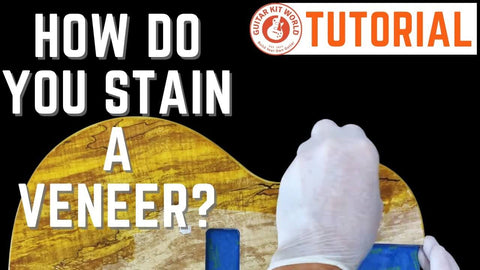
If the wood has an interesting grain pattern, like a beautiful quilted or flame maple, a transparent or semi-transparent stain finish is a great option as it showcases, and accentuates the wood's natural beauty.
Particularly in the case of quilted maple, using a stain finish can add depth and provide a 3D appearance to the finish (see example below).
The next image below shows a stained flame maple top. Notice, how it accentuates the striping of the flame maple pattern by providing greater contrast between the light and dark tones.
If your guitar is made from a less visually interesting wood such as basswood you will be well advised to opt for an opaque finish e.g. a solid color finish.
Don’t get me wrong, basswood is a popular, evenly-balanced tonewood and has been used succesfully in electric guitar construction for many years, but it’s fair to say it lacks the distinctive grain pattern of other tonewoods in most cases, and is usually ideal for solid color finishing.
With this in mind, it’s common for manufacturers (Ibanez for example) to pair less visually appealing woods with solid color finishes to create a uniform appearance.
When staining your guitar, another consideration to keep in mind is the density of the wood.
Tightly-grained timbers such as maple can be challenging to stain evenly due to their tight grain structure. Wood conditioner or pre-stain sealer can be useful in such cases.
Open-grained timbers can also be difficult to work with when applying a finishing material by hand. Mahogany, for example, tends to absorb stain far more readily than maple, making it difficult to apply stain evenly, which can result in a blotchy look.
Bottom Line: If your guitar lacks an attractive grain pattern consider an opaque finish e.g. solid color spray can finish. Alternatively, if your guitar has an attractive grain pattern consider a transparent or semi-transparent stain finish to highlight and accentuate the natural beauty of the wood. If staining consider the density of the wood and whether you need to use it as a woodconditioner or pre-stain sealer.
While it depends on the level of complexity and your artistic skills, if this is your first guitar building project we’d recommend against a custom-artwork finish.
While it can seem an appealing idea due to the level of personalization this kind of finish affords you, without prior experience, making custom artwork for wood surfaces, achieving a desirable result can be challenging.
However, if you are committed to achieving a custom artwork and are new to guitar finishing you could consider using decals or stenciling, and then protecting the artwork under a clear top coat.
You can design your own artwork or find pre-made decals or stickers that fit your style using design software or look online for retailers that offer customization options.
When it comes to stenciling you can purchase pre-made stencils or create your own using stencil paper or plastic sheets.
It’s all well and good to desire a beautiful sunburst finish after being inspired by the classic looks of a sunburst ST®, or instead opt for a high-gloss or metallic finish but if this is your first time finishing a guitar, again, it’s going to be difficult.
Likewise, achieving a mirror-like, high-gloss finish requires careful surface preparation, at least 4-5 layers of clear coat, and careful fine sanding and buffing to avoid imperfections. You can see how this is achieved here:
You should also factor in color selection if opting for a high-gloss finish. If you choose a dark finish e.g. black, this will make it all the more difficult as dark colors tend to show even the slightest imperfections.
Burst finishes on the other hand require a gradual blending of at least two colors (often more), usually graduating from dark to light. To do this well requires a good eye, and a steady hand to create a smooth, even gradient.
Metallic paints, on the other hand, can be difficult to apply well due to the need for consistent particle distribution, which prevents uneven coloration and/or a mottled appearance. Your workspace (ideally, a highly controlled workspace with dust-free conditions) will also need to be considered.
That’s not to say as a beginner you can’t attempt these types of finishes, but it’s best to understand the challenges involved first.
If you really want that high-gloss finish, one of the areas you will really need to focus on is surface preparation, and then fine sanding and buffing.
Recommended: Sanding a Guitar Body Prior to Painting
You can read more about that using the links below, but in simple terms your surface preparation is the most important aspect to achieving a flat finish. This is typically achieved by working your way up from a low grit sandpaper e.g. 120 grit and progressing to finer grit paper such as 320- 600 grit, carefully removing the scratch marks left by the coarser preceding sandpaper).
Recommended: Wood Grain Filler for Guitar Bodies
You may also want to sand between coats using 800-1000 grit sandpaper depending on the finishing materials you are using.
Lastly, fine sanding e.g. sanding after applying your finish and finally buffing using an abrasive material e.g. car polish will really help you achieve a mirror-like finish. This is easy enough to learn, but can take a considerable amount of time and elbow grease, especially if working without the benefit of power tools.
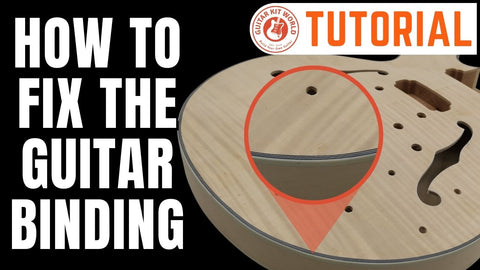
Lastly, if your guitar has binding, you should also consider how you will protect it.
If spray finishing, then the binding will either need to be masked (time-consuming and finicky) or you will need to be prepared to scrape the binding with a razor blade after painting which is also time-consuming and finicky.
This video from Gibson demonstrates how to scrape binding after finishing:
Bottom Line: If you have never finished a guitar before, consider a hand-rubbed oil finish (e.g. Tung Oil or Danish Oil) before tackling more advanced finishes on further projects. They are simple to apply using just a cloth, don’t require spraying or buffing and just happen to look great, as they penetrate the wood and enhance the natural grain.
If you are determined to create custom artwork consider using decals. These can still look highly personalized as decals can be custom ordered. Alternatively, if you really desire an aged look for your guitar, put in the time to investigate and practice (on spare material) wood and paint distressing techniques before attempting this kind of finish on your guitar.
Simple finishes tend to be the least expensive, in most cases. So, if you are working to a budget, a hand-rubbed stain and/or oil finish is going to be the least expensive option.
But if you want a solid color finish, spray cans can be an affordable option.
Water-based polyurethane is usually the best option for beginners due to its ease of application and faster drying time. It’s also a more forgiving finish, allowing a professional result with less experience.
Oil-based polyurethane however requires significantly longer drying time and can be harder to work with in terms of proving even coverage.
If you are chasing a vintage look and have the time (and extra money) nitrocellulose lacquer can provide a great result, but it’s better-suited to those with more experience as it it requires more precise application and has a strong odor.
I’ve finished many guitars using spray cans from my local hardware store. And, while there are a few things to keep in mind (which we have covered here) you can acquire a professional finish for minimal costs, especially if you spray light coats, and maintain a dust-free environment.
In terms of costs, most guitars usually require:
All up you are looking at approx. 7-8 cans which can be purchased for under $10 a can.
Bottom Line: A hand-rubbed oil finish is the least expensive option. In most cases, the guitar will require between 6-8 coats, which a 240ml bottle should allow for with some left over. Costs will vary but most products can be purchased online at Amazon for between $25 and $50. Alternatively, if using spray cans, costs will vary, but you could conceivably do the entire job for around $75.00.
The most difficult aspects of spray painting are dealing with overspray, maintaining a dust-free environment, and having space for the guitar to (usually hang) and cure.
You can spray outside, but you are then at the mercy of the weather conditions.
Windy days can be a problem due to particles being blown around and landing on your finish, and of course, you don’t want to be dealing with wet weather on your 2nd or 3rd coat of the day.
Hot days can also be problematic when it comes to paint curing.
Paint that dries too quickly can lead to an uneven application and/or streaks and may also trap solvents underneath, causing the surface to bubble or peel as it cures.
If working indoors and you have a suitable workspace e.g. a garage and intend to spray paint your guitar there are some precautions you should take.
This is predominantly due to safety concerns e.g. the solvents in most spray paints can cause fumes that have the potential to cause respiratory issues or allergic reactions, not to mention most paint products are highly flammable.
Below are a fewprecautions you should take:
Lastly, if spraying and have concerns about particles including dust in the surrounding air getting on your finish, control the airflow as much as possible and consider lightly spraying water (use a fne mist setting) into the surrounding air. This can help settle dust particles, as the water droplets cause the dust to fall to the ground.
A solid color finish with a number of clear top coats offers the best protection against knocks, moisture and general wear and tear from playing.
Lastly, I want to briefly discuss the protective qualities of your finish and why this should also be considered depending on your circumstances.
Obviously, the finish of your guitar will impact the appearance more than any other aspect of the build but, as mentioned in the introduction, the finish of your guitar is also the last line of defence in protecting your guitar.
The finish of your guitar seals the wood, shielding the guitar from moisture, dirt, oils from your hands, and physical wear, including knocks and bumps, ensuring that your guitar remains structurally sound and in good condition.
If you plan on travelling with your guitar this is something you should keep in mind. If this is the case, I would usually recommend a trip to your local automotive store to look at spray can options.
Gloss finishes tend to dry harder than satin finishes, so offer better overall protection. Satin or matte finishes usually include flattening agents that can affect the hardness of the finish. Gloss finishes on the other hand include higher levels of solid resins that contribute to hardness and durability.
Bottom line: Automotive paints offer great protection due to their durability and resistance to harsh conditions. Dupli-Color or Rust-Oleum Automotive Enamel are good options, providing a hard, long-lasting finish that can with stand harsh treatment better than most finishing products. Gloss also tends to dry harder than satin or matter finishes.
While the finish of your guitar is the most transformative aspect of building a kit guitar, if new to finishing consider more than just the final appearance.
It’s wise to take into account the wood your guitar is constructed from, your experience and skill level, budget and circumstances including your available working space.
Lastly, keep in mind finishing is an art form. It takes time and patience to learn, and relies on great surface preparation, something that takes time to master.
However, it’s not rocket science and anyone with the right attitude can learn how to get consistently great finishes. I hope the information above helps you get started.